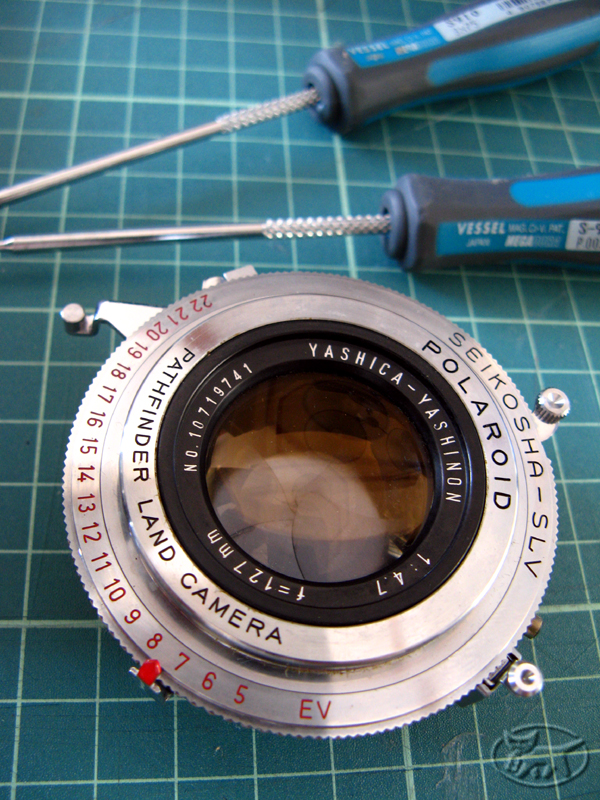
Author Topic: Nekotech - Polaroid Pathfinder 120 (or maybe 110 too) to Pack-Film Conversion.  (Read 78049 times)

Skorj

  • Global Moderator
  • Self-Coat
  • *****
  • Posts: 1,900
  • the black cat
    • Filmwasters.com
Part One - Getting Everything Ready.

Obtained one cheap, minty, made in Japan, roll-film Polaroid Pathfinder 120, in box with accessories. While not a single RF/VF, its shutter is B to 1/500 capable (the usually preferred-for-conversion 110B is only 1/300 I think), and f4.7 to f90. Not as fast as the smaller 195 it will sit along side, but as this is more about the how than the results, that does not really matter.

Roll-film folders - including the Pathfinder - are quite large cameras, and moderately heavy too. Though, its form factor is very pleasant and easy to use. The side-mounted leather strap particularly so. Size wise it is bigger still over a Fuji FP-1 and a Konica Instant Press, having a similar feel to operation of both these pack-film camera too. It is though a good deal larger than a 195 or other of the folding Polaroid pack-film camera from the same era.

Apart from the great information at the Land List site, a lot of other information available on the web is either wrong, or driven by egocentric sales opportunities, so this is designed to show all how it is done, and how easy it is!

Update: Hey! Just seen another great site that also describes another conversion in easy to understand terms. Check out Sean's great listing here: polaroid-110a-covertomation.

Big, bigger, biggest:


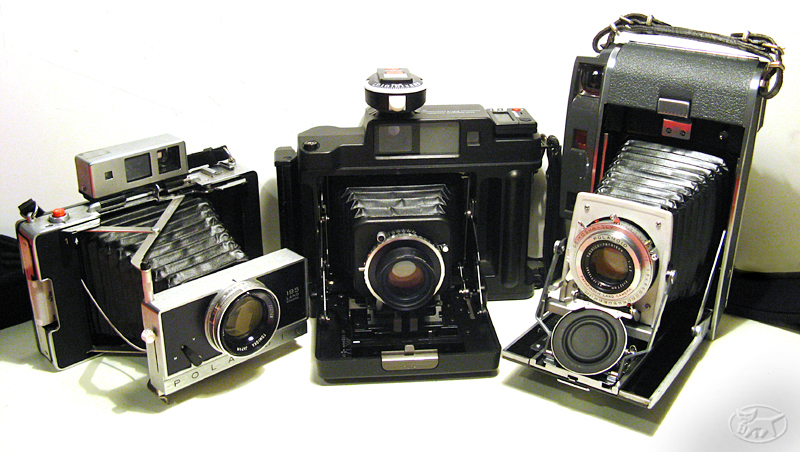
Hacking it up should result in a significant drop in weight, the metal clamshell backs, and the solid stainless steel rollers themselves weighing a lot. Hopefully too, not changing its otherwise pleasing ergonomics, or lovely stylish looks too much.


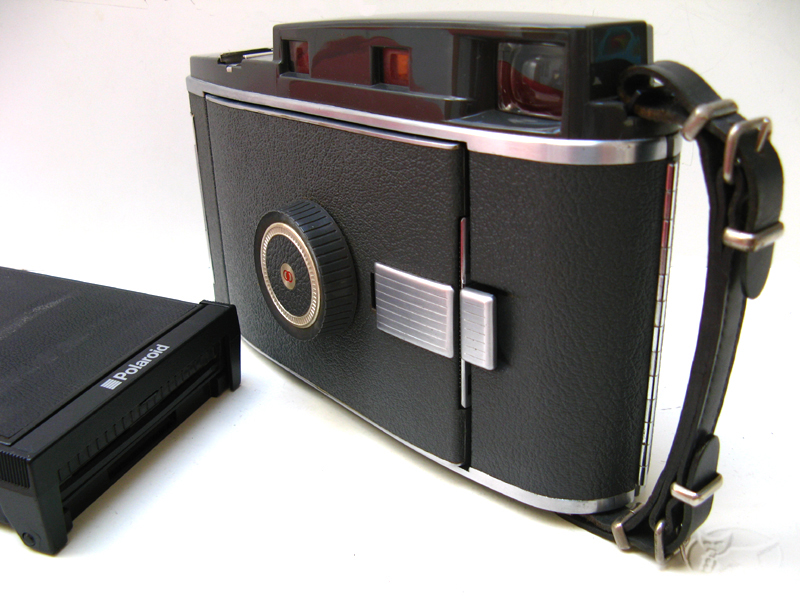
Roll-film fun box, and old 600 SE back scavenged from parts (broken tang).

The lens on this one appears particularly bright, with functions 100%, with really smooth and satisfying clicks and detents.


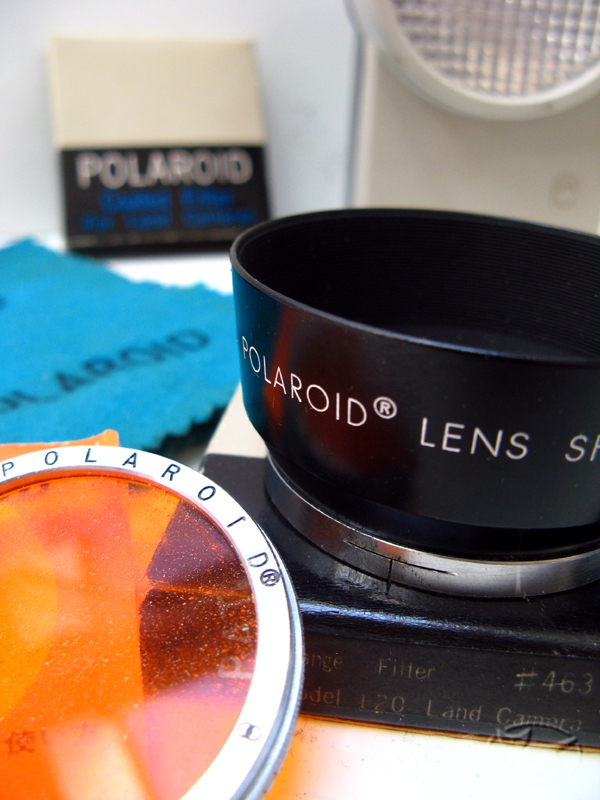
Great set of bits. Love the genuine lens cloth, and while the selenium meter was DoA, the ND and O2 filters will be used mightily with FP-3000 Fuji. The filters were covered in foam dust from their packaging:


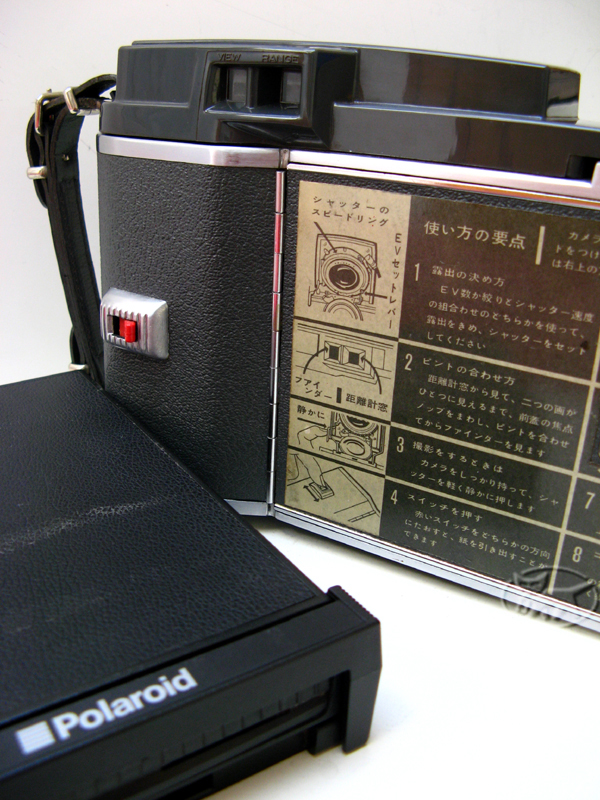
Period instructions on rear:


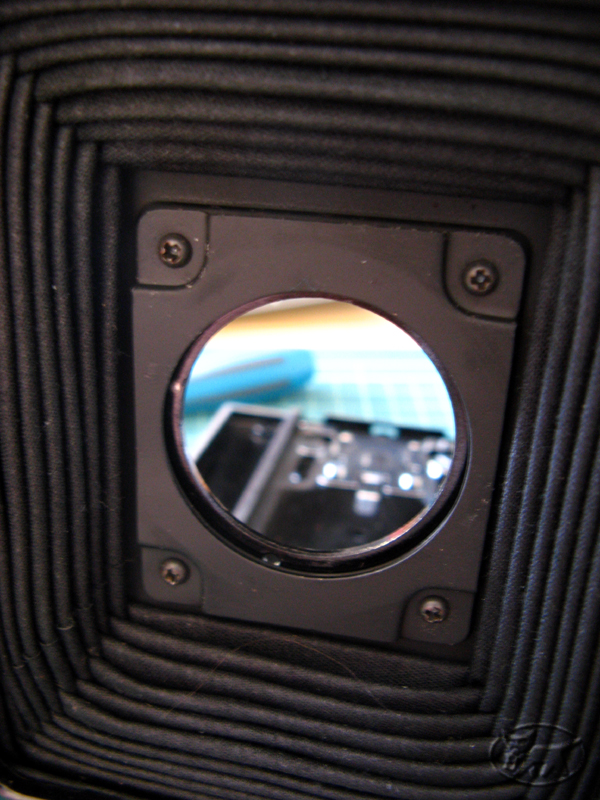
With both backs open, the concepts were apparent:


First, I removed the lens to protect it from the perhaps traumatic process coming. Avoid the lazy temptation to use pliers, and get yourself a real lens spanner, they are not that expensive and ensure scratches from slipped mis-used tools are kept to a minimum:


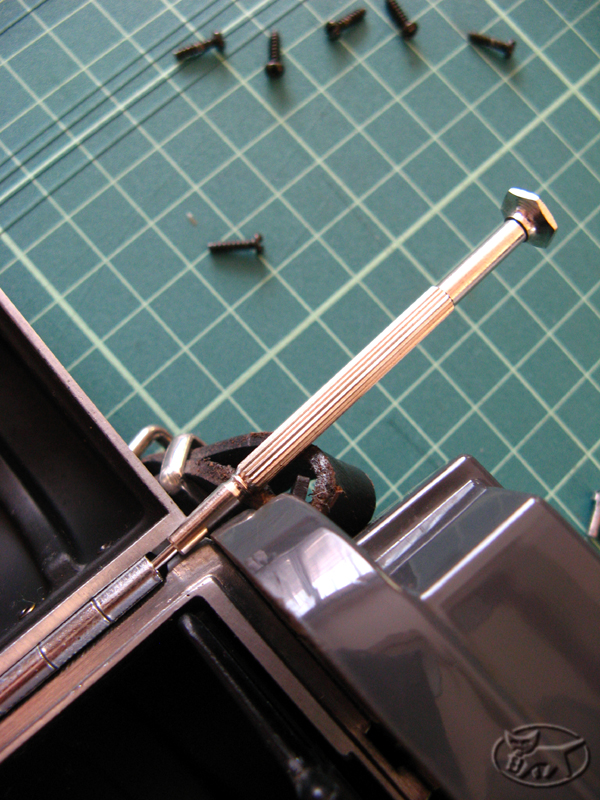
The lens has a small dowel, and the mount plate an appropriate hole so it cannot be misaligned on reinstallation. Next, I removed the wire pins from all back hinges. A light tap on an old screwdriver with a small hammer did the trick:


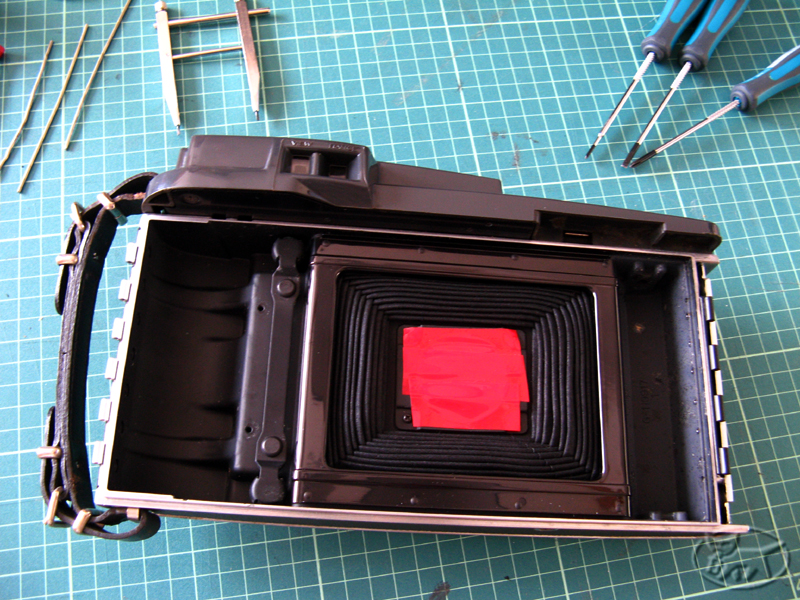
Removed original film spool holder with little screws, and taped lens hole:


Prepared donor back - removed 600 SE back's mount, and saved screws:


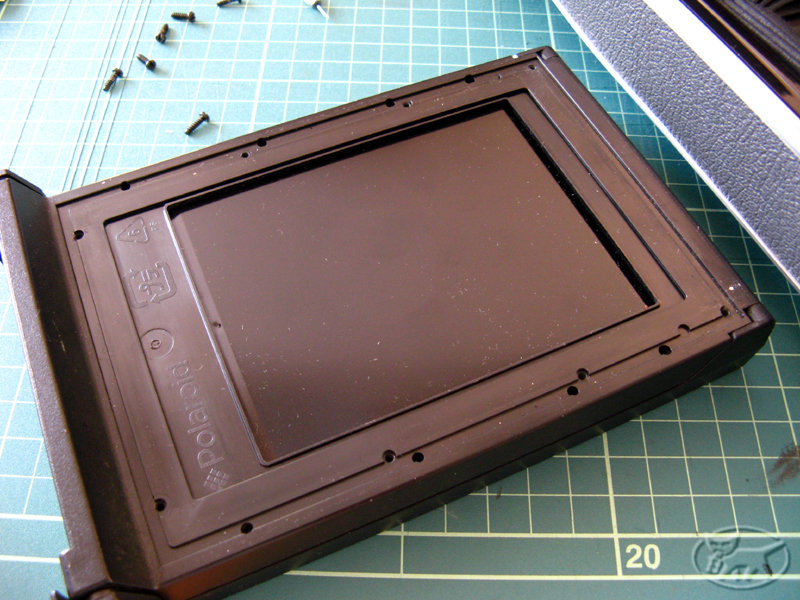
This is started to look feasible:


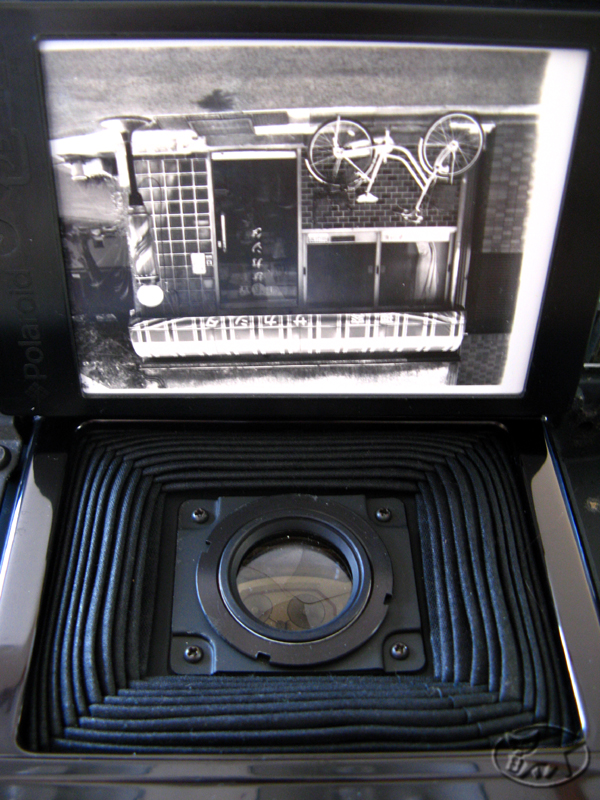
Film-pack and print matches original film-plane near 100%:


Every thing done so far has been non-destructive, next we cross the point of no return...

(53)
« Last Edit: June 04, 2009, 02:01:15 AM by Skorj »

Skorj

  • Global Moderator
  • Self-Coat
  • *****
  • Posts: 1,900
  • the black cat
    • Filmwasters.com
Re: Nekotech - Polaroid 120 Pack-Film Conversion.
« Reply #1 on: April 16, 2009, 09:43:45 AM »
Part Two - Major Life Threatening Surgery.

Next, I hacked out the lightly purple anodized frame surround. This either pries off with a moderate screwdriver, or you can drill the rivets. It also holds the rear bellows frame to camera body, so I will need to re-affix that later I suppose. But, with the objective to get the pack-film holder as close to the original film-plane as possible, this is necessary I think.

Update: yes, this is a definite requirement if you do not want to have to change your infinity focus point. It might result in a small delta in film plane position, but it is as close to same-same as to not really matter. If you plan on shooting 4x5 though, this would not be so as the film plane is right out there anyway.  So, do not believe all the folks who tell you they think they know everything!

Sash-brush prepared for swarf dusting:


I clipped off rivet remains to ensure as close as possible fit for the pack-film back:


As the next cut will traverse the back latch, better to remove. Two screws are visible, and two are under the leatherette cover:


Arrggghhhh....


After a few strokes of the saw (metal 32 point), I masked the bellows as well as the lens opening as there was a lot of swarf flying everywhere. Cut should be self-explanatory. Orange marks are remains of paint from new saw blade. I left the top-plate in situ to allow for parallel cuts to both top-plate and body. Should allow easier parallel re-trimming of both without a mis-matched edge.

Kind of a null-point, but if it was not for the need to pull the white-tabs out and forward, the whole pack-film back could probably fit inside the original 120 back with the yellow film tab being pulled through a slot on the original body end.

With space needed though to pull white-tabs at an angle, the 600 SE back can now be presented to body in close to final position:


As I wanted to keep the original smooooth understated style (no tacky re-trimming for this kitten), note strips of original leatherette left in place to assist in final trimming, and the worst condition part in the process the old 600 SE back:


The small flange on body appears to foul opening of pack-film back. Cast aluminum fractures easily though - first with a nick on the correct angle with some angle-cutters, then with a small pair of flat-nosed pliers:


Removing body flange on both sides allows for pack-film back to open smoothly. A small file can be used to smooth visible edge:


Pack-film back screw holes from 600 SE mount curiously appear to match original rivet holes on 120 body. Perhaps this can be used to secure the two:


At this point, I also removed all flash wires, from sync plug to hot shoe. With the OEM Wink Light a prop connection, they are not much use to anyone. Who uses flash anyway? They come away easily from under the focusing bed, one small sleeve, and the main body. Time for puffer-air, and sash-brush after taking off top-plate:


Windows are held in place with simple blued-metal springs, they pop out easily allowing cleaning of all transparent elements. While in here, I also gave the mirrors a light clean too, being careful not to effect tinting or silvering - two components necessary for proper RF functioning


You can work the focus with the top-plate off checking parallax frame correction, and smooth mirror function now too.  I then put the cleaned, clear elements back in place with the top-plate. Next, tidying the trim and mounting the back.

(114)
« Last Edit: June 04, 2009, 12:46:32 AM by Skorj »

Skorj

  • Global Moderator
  • Self-Coat
  • *****
  • Posts: 1,900
  • the black cat
    • Filmwasters.com
Re: Nekotech - Polaroid 120 (or maybe 110 too) to Pack-Film Conversion.
« Reply #2 on: April 16, 2009, 01:25:17 PM »
Part Three - Retrimming.

After cutting outside rear door to size, reinstall and retrim with suitable flap of leatherette:


Using original leatherette off the no longer needed rear door I retrimmed the visible areas of body cuts. Hopefully using the original leatherette will allow it to keep its original smooth tasteful style:


Focus wheel because it is so nice:


Next, refixing the bellows.

(143)
« Last Edit: April 17, 2009, 09:15:35 AM by Skorj »

Skorj

  • Global Moderator
  • Self-Coat
  • *****
  • Posts: 1,900
  • the black cat
    • Filmwasters.com
Re: Nekotech - Polaroid 120 (or maybe 110 too) to Pack-Film Conversion.
« Reply #3 on: April 18, 2009, 08:11:29 AM »
Part Four - Reattaching Bellows.

With the removal of the anodized aluminum film plate, the bellows attaching clips also come away. You could perhaps leave this in place, but it would appear this will add another1mm or perhaps more to the film-plane change. Reattaching the bellows with modern adhesives though does not appear to be a problem.

Without the attachment clips, the original light-tight adhesive was secure and had to be pulled away carefully. This then allowed easy cleaning of both rear of bellows, and camera body attachments flange.


Using some seriously sticky library tape, I covered all four edges of the rear bellows frame, I left a little over to ensure full bellows fold attached:


The only purchase needed so far, the massive expense of  \250 for a new box of double-clips:


After a small bead of white glue between bellows frame and first bellows fold, I clamped for 24 hours. I use the same white glue for fixing Fujipet covers as it was made for the cloth/leatherette to metal job there, so hopefully it will assist with the low-stressed first fold to bellows frame too.

White glue dries clear, and while wet makes for easy application and easy clean up. An alternative would have been contact adhesive, but accurate application in small spaces is often difficult, it is messy to clean up, and dries with unsightly streaks. It does stick like crazy though, and was used on this 120 for leatherette application - none of which had lifted, and was a real damned bugger to lift 40 years later.


After the white glue dried, I used some flexible black silicone caulk to add a third later of attachment, smoothing the edge, and also if the previous two adhesive applications did not, hopefully making it light proof too:


Next, attaching the 600 SE pack-film back.

(163)
« Last Edit: April 22, 2009, 10:53:30 AM by Skorj »

Skorj

  • Global Moderator
  • Self-Coat
  • *****
  • Posts: 1,900
  • the black cat
    • Filmwasters.com
Re: Nekotech - Polaroid 120 (or maybe 110 too) to Pack-Film Conversion.
« Reply #4 on: April 22, 2009, 10:38:15 AM »
Part the Fifth - Attaching 600 SE Back.

This is the last remaining big task, adding these two parts together:


One option eliminated early was taking the mount off one of the Studio Expresses I have laying around. This would have resulted in the ability to carry changeable backs, but with a 600 SE already on the kit list, this benefit was not needed. Especially as weight minimization was part of the original concept.

The Studio Express mount comes away really easy from the camera, but as it is also very thick, and would have also resulted in a massive recalibration of the sure to be well off focusing system.

Despite the body rivet holes matching with the back screw holes, I elected to go the easy route. The original back screws would have worked nicely, but I was concerned about their extension into the bellows space (possible squeezing against the folded bellows when collapsed), and even though some smooth 1mm cheese-head bolts going the other way (front-to-back) may have minimized this, ensuring a light-proof fit would still have required the application of some tape or adhesive.

So, I used a not too small bead of god-in-a-tube (JB Weld) along the top and bottom of the 600 SE back:


When the back (or really just the frame of the back as all other parts had been removed) was presented to the camera body and pressure applied, the JB Weld diligently formed little plastic rivet heads through the screw-holes like Vegemite on a Ryvita:


This should result in a very firm fit of the two parts.

Twenty-four hours later, with the JB Weld squdges blacked with a marker pen, the remaining gap between the body and the back (where the camera was cut) remained to be filled. I used the plastic back of a Fuji Film FP-400 pack for this job, as it cuts nice and easy with a set of scissors, and was a perfect thickness to not foul the pack insertion:


With the newly cut piece in place, it almost looks like a bought one:


The no longer needed parts pile:


Next: the tidy ups and some testing.

(302)
« Last Edit: May 16, 2009, 09:51:40 AM by Skorj »

Skorj

  • Global Moderator
  • Self-Coat
  • *****
  • Posts: 1,900
  • the black cat
    • Filmwasters.com
Re: Nekotech - Polaroid 120 (or maybe 110 too) to Pack-Film Conversion.
« Reply #5 on: April 23, 2009, 09:43:51 AM »
Sixth Part - Small Tidy-Ups.

Three or four small items still need to be completed. Reinstall the lens the way it came out - this just slots in nicely in a one-step procedure, giving the securing ring a decent, but not overly heavy twist to seat it. Test fit the OEM lens hood too:


Note now vacant flash sync socket from removed cable to old hot shoe. Next, secure original rear door with a small tab of shaved self-adhesive Velcro:


The door no longer flops about, and with the right thickness of Velcro or perhaps a tape tab on this point, there should be no need for any other complicated fixing mech for holding the rear door closed. If this does not wear too well, then the stainless spring from the original film-back, hot-glued, with both sided Velcro is waiting in the tool-box. Both these options weigh close to zero.

Clean original filters of their rotted foam packing, and add some smooooth mink-oil to the leather strap:


The final task, adjusting the zero-infinity focusing range perhaps needed as a result of changed film-plane position I decided to wait and see after running a few test shots at infinity, and zero-focused at f4.7.  With the intent to have kept the new film-plane as close as possible to the old, we shall see.

Next: some test shots, and final job presentation. I am looking forward to getting out on the streets and using it after a few weeks of tinkering. The shutter release is a bit cumbersome - even for long fingers - but there is something satisfying shooting with an EV-calibrated camera. The auto-coupled EV function is tremendous on the 195, but the 120 uses a little more complicated locking knob function that can slip if you're not careful.

(331)
« Last Edit: June 04, 2009, 05:29:08 AM by Skorj »

Skorj

  • Global Moderator
  • Self-Coat
  • *****
  • Posts: 1,900
  • the black cat
    • Filmwasters.com
Re: Nekotech - Polaroid 120 (or maybe 110 too) to Pack-Film Conversion.
« Reply #6 on: April 24, 2009, 11:47:23 AM »
Part Seven - The Finished Job.

Ready for shooting. The Gossen does not fit the style, but with the original selenium dead, and my 195 selenium elsewhere, this will have to do. Plus I want to check exposures with a moderately accurate source meter:


Rear showing how accurate my rear-door cut was. Concerned about fouling the 600 SE back, I cut perhaps a mm too much off:


Overall fit though of the 600 SE back is pleasing and better than I expected:


Normal view of cleaned kit. Just love that period font on the lens surround:


Looks almost normal:


Until you turn it around:


Bottom plate retains original finish and tripod socket, and starting with a hardly used, near mint donor 12o certainly made the process easy, and the finished result quite pleasing to look at. Hopefully a respectful conversion, and one to promote Polaroid's original Pathfinder concept at least for a few more years yet:


One reinvigorated Pathfinder 120, so next: some test shots.

(368)
« Last Edit: May 26, 2009, 11:23:00 PM by Skorj »

Skorj

  • Global Moderator
  • Self-Coat
  • *****
  • Posts: 1,900
  • the black cat
    • Filmwasters.com
Re: Nekotech - Polaroid 120 (or maybe 110 too) to Pack-Film Conversion.
« Reply #7 on: April 25, 2009, 07:25:03 AM »
Part Eight - Test Shots.

Out at lunch yesterday, a few quick shots behind my work with half a pack of Fuji Film FP-400B. Test shot on wall with minimum set focus at f4.7. Looks OK without any readjustment of focus bed length:


I do detect a small glow frame left, perhaps from a light leak. I held camera to bright, bright sun in an attempt to test for leaks. Slight leak apparent here too with shot of two workers enjoying the lunchtime sun. One told me he used to have a Polaroid camera a while ago, but only had his keitai camera these days (shot at f8 or similar I think).


In the ten minute walk around my block, it can even take real photographs too (f45 & 1/15):


Next, a few more packs, including some FP-3000B, and some infinity focused tests to confirm no need to change base focus adjustment to compensate for 600 SE back and slight change in film plane location. Maybe also a closer check for source of possible light leak - most likely from gap on right of frame pack from added piece of plastic.

« Last Edit: May 13, 2009, 12:49:24 PM by Skorj »

Skorj

  • Global Moderator
  • Self-Coat
  • *****
  • Posts: 1,900
  • the black cat
    • Filmwasters.com
Re: Nekotech - Polaroid 120 (or maybe 110 too) to Pack-Film Conversion.
« Reply #8 on: April 26, 2009, 08:27:27 AM »
Part Nine - Light Leak Kludge.

I wanted dark gray, but the contrast looked a bit off, so some black special fix-converted-Polaroid-light-leaks filler was used to run a quick fix on possible source of small leak. Seemed to work well enough today out in the bright sunlight, so I might attempt a more elegant fix one day.


The soft foam fits well, and adds a nice feel, though it does look a bit off - particularly here when it looks like its got a bit of a swelling happening before it was fully installed. Results with Chocolate (thanks Ken!) today are interesting, though, I am not sure Chocolate is the right film for detailed camera tests. Fun though, with nice DoF at f4.7...

The 120 certainly gets a lot of attention in the street too. Bed down, and bellows out it is a large machine, and a number of folks stop and want to talk about it. Shooting with a 600 SE and a 195 regularly never seemed to get much attention, but the 120 looks the business and my usual street routine of asking people to pose was well received with others asking to pose as well. The 120 is a really pleasing camera to use - all controls function smoothly, with a great well-engineered feel to them. The overall quality of the original build is very high quality, and it is easy to see how this forty year old camera still functions today as well as it did when first made.

The camera is nowhere near as heavy as it first was now, and carries in the street well with both the side leather hand-strap, or an added shoulder-strap using the same fixing points. Any modern, standard configuration shoulder-strap can be used after the leather strap is unbuckled.  If you are going to be out-and-about with a 120 this would be a good recommendation.


and some FP-3000 goop, where I would really expect to see a leakski:


and some normal FP-3000:


Arigato!


(430)
« Last Edit: May 16, 2009, 10:30:30 AM by Skorj »

gary m

  • Sheet Film
  • ****
  • Posts: 452
  • Listen to the picture
    • Gary Moyer
Excellent project and write up Mark, congrats!

Skorj

  • Global Moderator
  • Self-Coat
  • *****
  • Posts: 1,900
  • the black cat
    • Filmwasters.com
Excellent project and write up Mark, congrats!

Thanks! It was certainly entertaining... It can really be done by anyone who can wield a hack-saw with reasonable accuracy. A steady hand to apply glue and other stick stuff helps, but other than that the only other needed was time, and the parts. Kinda like the Romans I suppose and them roads...

Feel free to ask detailed questions of you want to contemplate a similar job. Have fun. Skj.
« Last Edit: May 06, 2009, 03:43:12 AM by Skorj »

Brian Scott Peterson

  • 35mm
  • *
  • Posts: 28
  • Time flies like an arrow fruit flies like a banana
    • brianscottpeterson.com
One of the most impressive and hands down coolest experiments I have ever seen, executed with style...

Just incredible...

You are my hero, Skorj AKA Nekotech...
Time flies like and arrow, fruit flies like a banana...

http://brianscottpeterson.com
http://zokyo.jp

moominsean

  • Global Moderator
  • Self-Coat
  • *****
  • Posts: 2,173
  • Living in camera shadows.
    • moominstuff
lens defnly seems to be a bit wider than the 127mm would suggest. maybe it's just that extra bit of frame? great stuff, though. both you and the camera take fantastic shots!
"A world without Polaroid is a terrible place."
                                                                  - John Waters

moominsean

  • Global Moderator
  • Self-Coat
  • *****
  • Posts: 2,173
  • Living in camera shadows.
    • moominstuff
Working on the same project now, it's much less daunting than initially supposed. I avoided it for a long time because it just seemed beyond my skill set, but it's actually a very straightforward procedure, and just requires some thought as to the best way to work things through, and some creativity in making the finished product look cool. Quite fun, really, and now i want to convert more!

Here's my work to date:


more here:

http://moominsean.blogspot.com/2009/05/polaroid-110a-covertomation.html
« Last Edit: May 26, 2009, 05:56:03 PM by moominsean »
"A world without Polaroid is a terrible place."
                                                                  - John Waters

Skorj

  • Global Moderator
  • Self-Coat
  • *****
  • Posts: 1,900
  • the black cat
    • Filmwasters.com
Hey Sean! That looks just great. I especially like the top-plate intact look, and the secret compartment for pack-film prints on the rear. Does your print automagically appear under the door too? Now, that would be kakoii! Skj.
« Last Edit: May 26, 2009, 08:07:59 AM by Skorj »

moominsean

  • Global Moderator
  • Self-Coat
  • *****
  • Posts: 2,173
  • Living in camera shadows.
    • moominstuff
it's even easier the second time around! this is less than three hours of work. i'm really enjoying this...


ye old J66, cost me $6.
« Last Edit: September 26, 2010, 04:56:42 PM by moominsean »
"A world without Polaroid is a terrible place."
                                                                  - John Waters

moominsean

  • Global Moderator
  • Self-Coat
  • *****
  • Posts: 2,173
  • Living in camera shadows.
    • moominstuff
fin! the epoxy is still drying, so haven't tried it out yet. hmmm...what to convert next?

http://moominsean.blogspot.com/2009/05/quick-on-heelsthe-polaroid-j66.html
« Last Edit: September 26, 2010, 04:57:04 PM by moominsean »
"A world without Polaroid is a terrible place."
                                                                  - John Waters

Skorj

  • Global Moderator
  • Self-Coat
  • *****
  • Posts: 1,900
  • the black cat
    • Filmwasters.com
Re: Nekotech - Polaroid Pathfinder 120 to Pack-Film Conversion.
« Reply #17 on: June 04, 2009, 05:27:05 AM »


« Last Edit: June 04, 2009, 05:30:22 AM by Skorj »

moominsean

  • Global Moderator
  • Self-Coat
  • *****
  • Posts: 2,173
  • Living in camera shadows.
    • moominstuff
« Last Edit: September 26, 2010, 04:55:13 PM by moominsean »
"A world without Polaroid is a terrible place."
                                                                  - John Waters

old camera fiend

  • 35mm
  • *
  • Posts: 1
I just discovered this delightful site and I just had to say how much I enjoyed reading about the conversion.
I gotta do one of those for myself. Years ago when I was running around the Chicago area, I used a Polaroid
195 and a 4x5 Crown graphic which I no longer have and a Rollieflex which I still have. I bought that little
bugger 50 years ago used and still love it. But back to the topic, I just gotta do one of those conversions
for myself now that as a retiree and living in a beautiful area with a lot of Polaroid cameras lying around.....

Skorj

  • Global Moderator
  • Self-Coat
  • *****
  • Posts: 1,900
  • the black cat
    • Filmwasters.com
I gotta do one of those for myself.
The conversion is pretty easy, small hand tools, and a bit of engineering the light leaks, but good luck! Skj.

DrewCollier

  • 35mm
  • *
  • Posts: 13
I just finished my conversion and want to thank Skorj and Moominsean so much for your guides. They helped me out so much. I used Dremel cutoff wheels to cut the body instead of a saw. One tip I have for everyone doing this is to cut everything a bit long and file it back. You can make everything more flush.

I used a back from a Bronica GS-1 that I picked up for 12 bucks and took off the front of it to make it work. The camera with the closeup kit and the tripod mount was 20 bucks at an antique swap meet.

Skorj

  • Global Moderator
  • Self-Coat
  • *****
  • Posts: 1,900
  • the black cat
    • Filmwasters.com
That's one really nice job! Possibly the smoothest, and cleanest I've seen. Looks well executed, and suits the overall camera too. Look forward to the results! Nice. Thanks for posting. Skj.

moominsean

  • Global Moderator
  • Self-Coat
  • *****
  • Posts: 2,173
  • Living in camera shadows.
    • moominstuff
"A world without Polaroid is a terrible place."
                                                                  - John Waters

Skorj

  • Global Moderator
  • Self-Coat
  • *****
  • Posts: 1,900
  • the black cat
    • Filmwasters.com
That's one great looking device there Sean. All Russian-like! Any nice lens attributes perhaps? Skj.

jojonas~

  • Self-Coat
  • *****
  • Posts: 2,928
  • back at 63° 49′ 32″ N
    • jojonas @ flickr
looks harcore! I bet it's perfect for portraits of weathered men in ushankas ;)
/jonas

Ed Wenn

  • Global Moderator
  • Self-Coat
  • *****
  • Posts: 4,258
  • Slowly getting back into it. Sometimes.
You're all freakin' geniuses. I love this thread. When I find a window of time in my life I'll be looking up a 110 or something and trying this out. I've always loved the look of those older roll film Polas.

Photo_Utopia

  • Sheet Film
  • ****
  • Posts: 661
  • The artist also known as Mark Antony
    • Photo Utopia
Wow! what a great thread. Makes me want to use Pola too, if I did I'd certainly love one of those bellows type land cameras.
Well done everyone.
There's more to this photography thing than meets the eye.

Phil Bebbington

  • Self-Coat
  • *****
  • Posts: 2,568
    • Phil Bebbington
Holy shit! Blown away, really, guys. Great work by all and an inspiration.

mgd711

  • 35mm
  • *
  • Posts: 9
  • I blame it all on Phil and Angie
    • The Fiery Scotsman
I now have two old Polaroid cameras, a 900 converted by Dean of Razzledog fame for 4x5 film and a 110A converted by Randy at Holgamods for Fuji pack film. The only thing with the 110A is that the VF is way off and I've read on Dean's site that to correct it I'd need a 110B vf installed.

(yes, its a long time since I last posted here... Nearly 4 years!)
« Last Edit: February 06, 2011, 11:46:55 AM by mgd711 »
Arse!

Skorj

  • Global Moderator
  • Self-Coat
  • *****
  • Posts: 1,900
  • the black cat
    • Filmwasters.com
I now have two old Polaroid cameras, a 900 converted by Dean of Razzledog fame for 4x5 film and a 110A converted by Randy at Holgamods for Fuji pack film. The only thing with the 110A is that the VF is way off and I've read on Dean's site that to correct it I'd need a 110B vf installed.

(yes, its a long time since I last posted here... Nearly 4 years!)

Interested perhaps then to compare the conversions... Feel free to add further comment, and results of your work too then? Skj.

Skorj

  • Global Moderator
  • Self-Coat
  • *****
  • Posts: 1,900
  • the black cat
    • Filmwasters.com
This is great! A regular Pathfinder club. Did you cut the top plate, or leave as is, like Sean? Skj.

Skorj

  • Global Moderator
  • Self-Coat
  • *****
  • Posts: 1,900
  • the black cat
    • Filmwasters.com
That looks pretty neat!

Cadha13

  • 120
  • **
  • Posts: 121
  • Nothing to see here.
    • My Flickr
I converted a Model 800 last year. It was pretty fun and it's pretty easy to use. I once had a 110B but I had to sell it before I got my hands on a Polaroid Back many years later. If anyone wants a Model 203 Passport camera, it's yours. :)

I had some practice converting a Model 900, but since the infinity stops were fixed and that was not going to work. I also added a hot shoe to it so I can shoot the color easily and I rewired the x sync on the camera to the wiring and plugged that into the hot shoe.


_DSC8524 by Cadha13, on Flickr

Here's the rear of the camera before I put the original instruction sticker back on.


_DSC8525 by Cadha13, on Flickr

Also I fixed some light leaks using some gorilla glue, since that stuff expands and fills gaps. It also remained totally light proof, since the glue is white, but the bubbles became dense enough to become opaque.

I love this camera a lot and like to shoot with it every now and then. It's manual, but daylight is always at EV 15 @ 100 iso. Also I have some close up lenses for it and they work pretty well. I like doing this every now and then. It's cool to see others make the Polaroids come to life again.